Configure SAML-Based SSO
This page explains how to configure and use Single Sign-On (SSO) based on the Security Assertion Markup Language (SAML) 2.0 standard protocol.
::: Prerequisite
Be familiar with the basic concepts of Single Sign-On (SSO).
:::
Supported SAML Services
The EMQX Dashboard can integrate with identity services that support the SAML 2.0 protocol to enable SAML-based single sign-on, such as:
Other identity providers are in the process of integration and will be supported in future versions.
Configure SSO by Integrating with Okta
This section guides you on how to use Okta as an Identity Provider (IdP) and configure SSO. You need to complete configurations on both the Okta and EMQX Dashboard sides.
Step 1: Enable Okta in EMQX Dashboard
- Go to System -> SSO in the Dashboard.
- Select the SAML 2.0 option and click the Enable button.
- On the configuration page, enter the following information:
- Dashboard Address: Ensure users can access the actual access address of the Dashboard, without specifying a specific path. For example,
http://localhost:18083. This address will be automatically concatenated to generate the SSO Address and Metadata Address for IdP-side configuration. - SAML Metadata URL: Leave it temporarily blank and wait for Step 2 configuration.
- Dashboard Address: Ensure users can access the actual access address of the Dashboard, without specifying a specific path. For example,
Step 2: Add a SAML 2.0 Application in Okta's Application Catalog
Log in to Okta as an administrator and go to the Okta Admin Console.
Go to the Applications -> Applications page, click the Create App integration button, and select
SAML 2.0as the sign-in method in the pop-up dialog, then click Next.On the General Settings tab, enter your application name, for example,
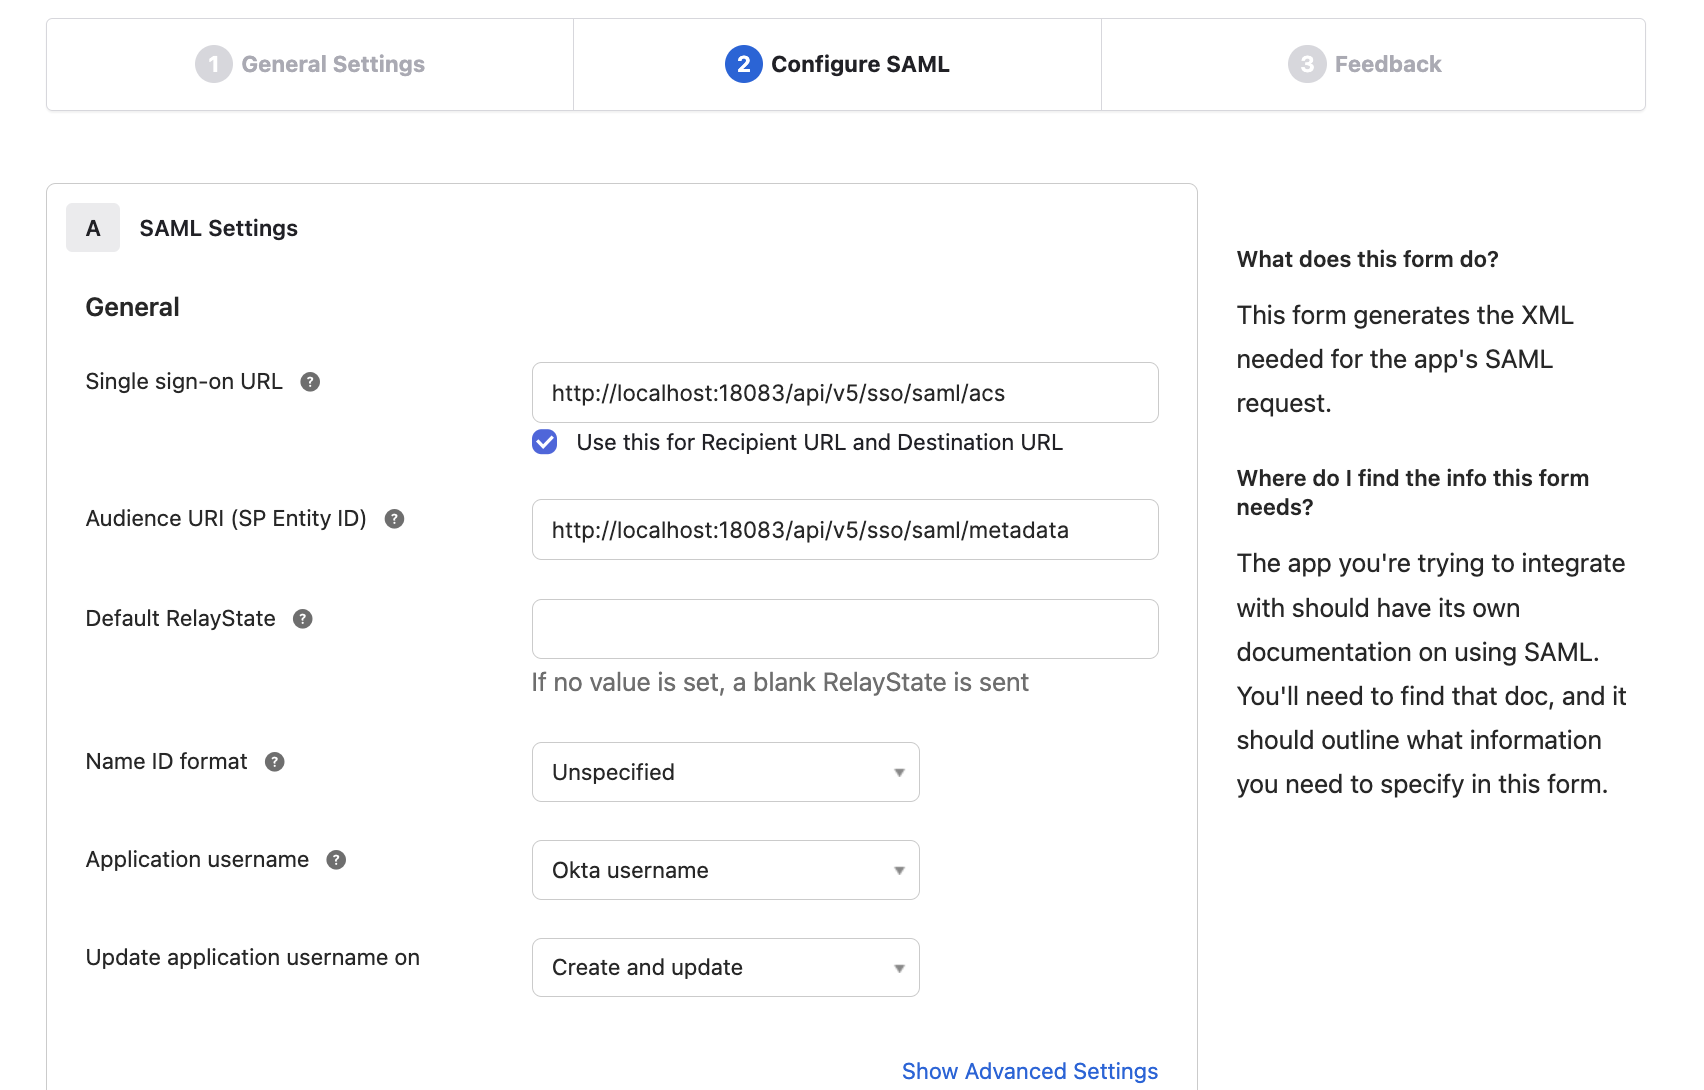
EMQX Dashboard. Click Next.On the Configure SAML tab, configure the information provided in Dashboard in Step 1:
- Single sign-on URL: Enter the SSO Address provided in Dashboard, for example,
http://localhost:18083/api/v5/sso/saml/acs. - Audience URI (SP Entity ID): Enter the Metadata Address provided in Dashboard, for example,
http://localhost:18083/api/v5/sso/saml/metadata.
Other information is optional and can be configured based on your actual requirements.
- Single sign-on URL: Enter the SSO Address provided in Dashboard, for example,
Review the settings and click Next.
On the Feedback tab, select I'm an Okta customer adding an internal app, fill in other information as needed, and click Finish to complete the application creation.
Step 3: Complete Configuration and Assign Users and Groups in Okta
- In Okta, go to the Sign On tab and copy the Metadata URL.
- In the Dashboard, paste the copied Metadata URL into the SAML Metadata URL in Step 1 and click Update.
- In the Okta > Assignments tab, you can now assign users and groups to the EMQX Dashboard application. Only users assigned here can log in to this application.
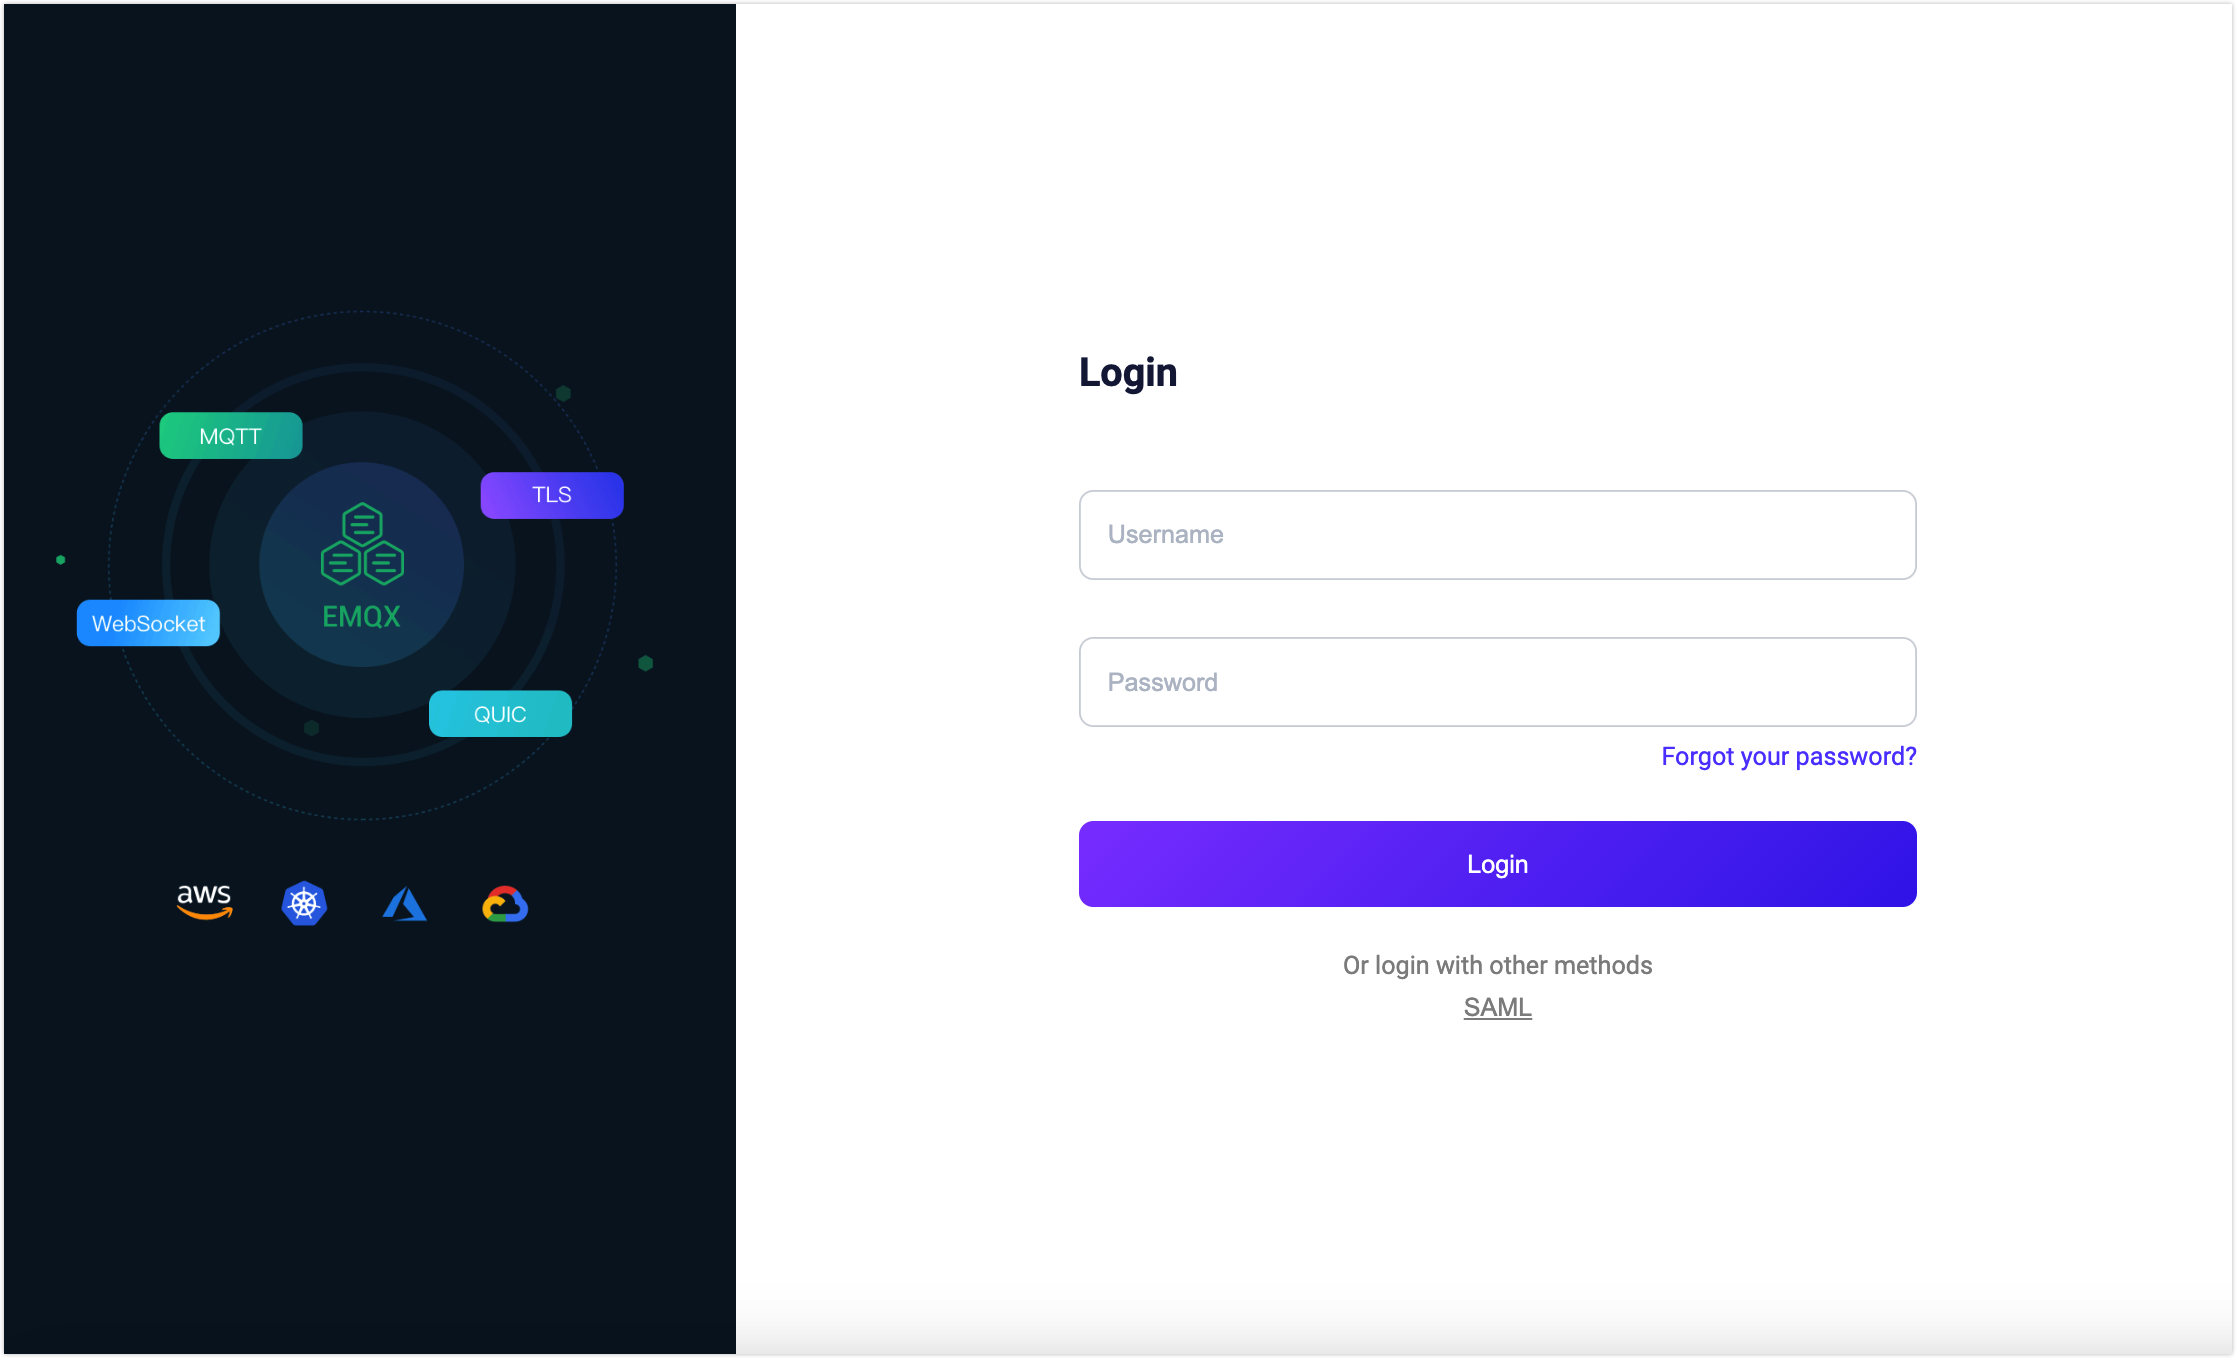
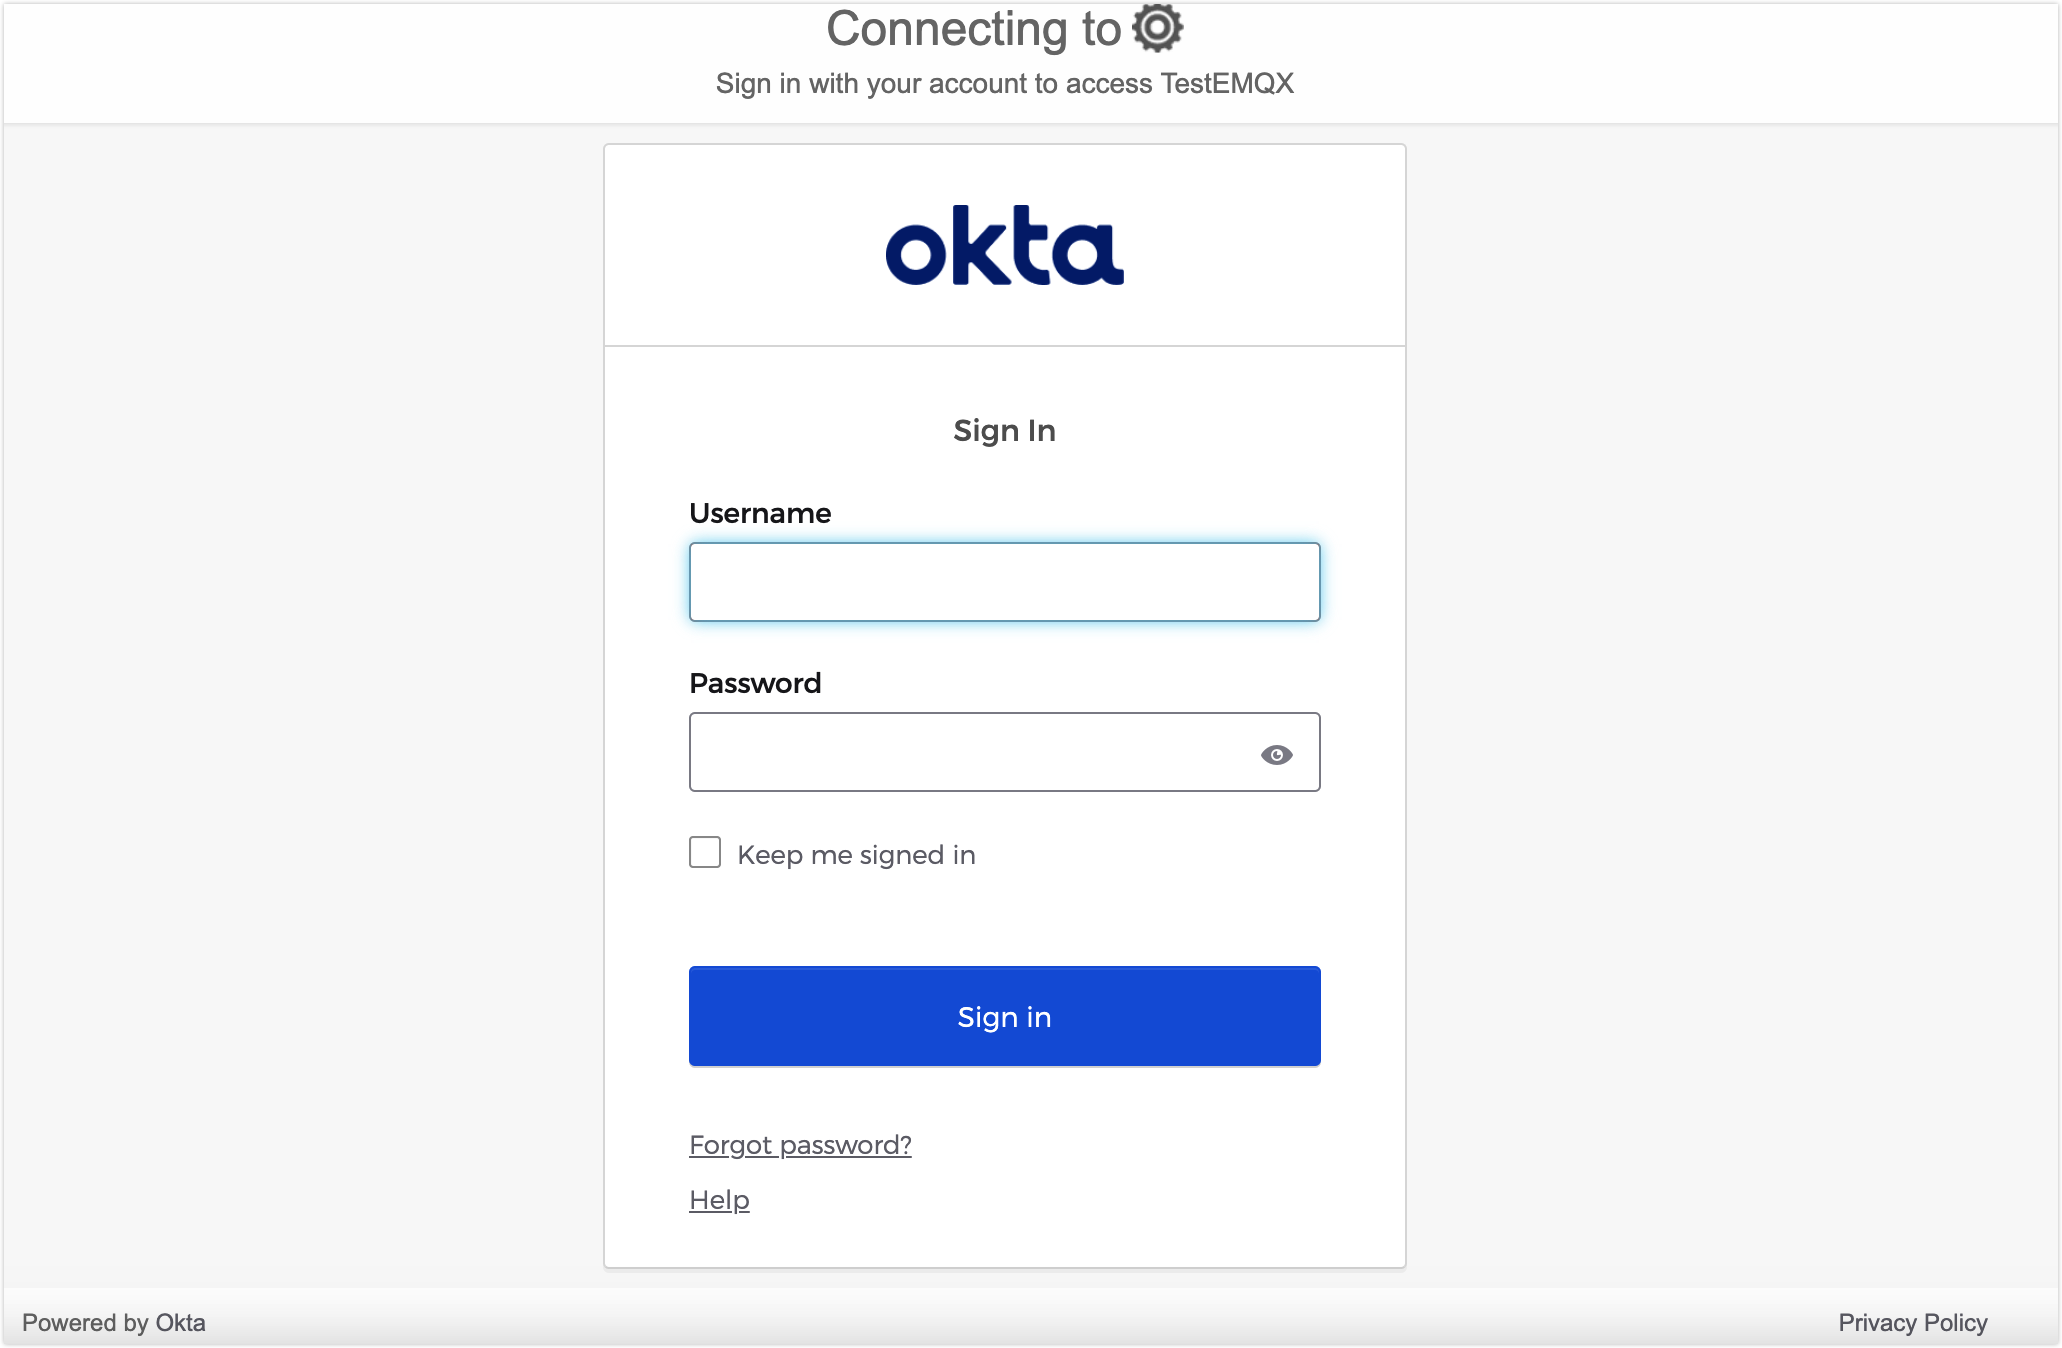
Login and User Management
After enabling SAML Single Sign-On, the EMQX Dashboard will display the Single Sign-On option on the login page. Click the SAML button to go to the IdP preset login page, where you can enter the credentials assigned to the user for login.
After successful LDAP authentication, EMQX will automatically add a Dashboard user, which you can manage in Users, such as assigning roles and permissions.
Logout
Users can click their username in the top navigation bar of the Dashboard and then click the Logout button in the dropdown menu to log out. Please note that this only logs you out of the Dashboard, and SAML does not currently support Single Sign-Out.